Willem Eprom Pcb50 Software Download
Willem EPROM PProgrammer PCB 50© and PCB4.5C can support the chip 29/39/49LVxxx (Low Voltage 3.3V). Uses the power supply from the USB Supports Win9X, Me, XP, NT, 2000 and VISTA operating systems. Updated software Willem EPEOM PCB 50a(0.98D12)© only support The newest. Mod purevpn full download. PCB4.5C, PCB4C, PCB3.5, PCB3b, SoftwareVersions:0.98D12C3, Software of the ordinary- 1 Qty/ Willem EPROMProgrammer PCB 50X- 1.You can choose between Version PCB3B/PCB3.5 and PCB4.5C usingjumper setting if Willem EPROM Software.
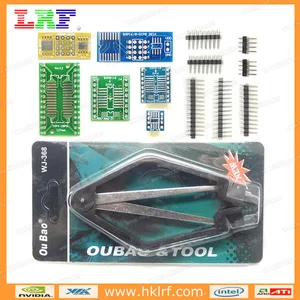
Standard PCB3B Willem Programmer User Guide Enhanced/Dual Powered Willem EPROM Programmer User Guide Main Board / Cables Main Board PCB3.5 Main Board PCB4E Main Board PCB5.0 Main Board PCB5.5C Parallel Data Cable (Printer extension cable, with male-female 25 pin connector, and pin to pin through) A-A type USB cable(for power) Optional Items: ATMEL 89 Adapter ATMEL PLCC 44 Adapter TSOP 48 Adapter FWH/HUB PLCC32Adapter PLCC32 Adapter SOIC Adapter(Simplified) On-Board On-Board AC or DC Power Adapter (9V or 12V, 200mA) SOIC Adapter(Professional). Set the DIP switch based on the displayed pattern. (Note: the LPT port of PC MUST set to ECP or ECP+EPP during BIOS setup. To enter the BIOS setting mode, you need press 'Del' key or 'F1' key during the computer selftest, which is the moment of computer just power up.) Software Version To Use The software can be download from There are board hardware selection jumper on the board.
When set the jumper to PCB3B, then user have to use 0.97ja and before version software. If the board selection set to PCB3.5, PCB5.0, PCB5.5C, then the software 0.98D6 should be used.
The software interface: Hardware Check After start the program, click test hardwar under Help menu. If the connection and power supply is normal, then appears: 'Hardware present' Otherwise check if the programmer connects well with PC, or power supply is normal. PCB3.5/PCB4E (Two PLCC32 adapter is not applied on the PCB4E) PCB5.0 PCB5.5C Note: the Vcc setting jumper only has effect when you are using AC adaptor as power source. For the USB power only 5V Vcc is available. For the PCB5.5C, set DIP steps: 1.
Press DIP Set button twice to check current DIP bit position. Then set it again for ON or OFF. Press DIP Bit shift button to shift the DIP bit position to where need to set.
And then press DIP Set button twice to check current DIP bit position. Then set it again for ON or OFF. Repeat those steps till all DIP bit ae set same as software indicated. For PCB5.5C voltage and Special chip selection: 1. Put back the safety jumper.
Press the voltage button and hold for 1 second, the voltage LED should move to next. Repeat till desired voltage LED light up. Press the chip selection button and hold for 1 second, the chip LED should move to next.
Repeat till desired LED light up. Remove the safety jumper to lock the selected voltage and chip selection DIP Switch (PCB3.5, PCB5.0) When programming one chip, follow the program prompt to set DIP switch. The screen: Steps: • Before test, set the DIP switch, jumper setup to software prompted • Address Pin Test: click the one of the push button in the Address Out group, use multimeter detect output signal in the ZIF32 socket. Or directly input the adress data, the range is:0--7FFFFH A0-PIN 12, A1-PIN 11, A2-PIN 12, A3-PIN 9, A4-PIN 8, A5-PIN 7, A6-PIN 6, A7-PIN 5, A8-PIN 27, A9-PIN 26,A10-PIN 23, A11-PIN 25, A12-PIN 4, A13-PIN 28, A14-PIN 29,A15-PIN 3, A16-PIN 2, A17-PIN 30 • Data Pin Test: click one of the push button in Data Out group, use multimeter confirm the data from ZIF socket. Alternatively, input the test data, the range is: 0--FFH; D0-PIN 13, D1-PIN 14, D2-PIN 15, D3-PIN 17, D4-PIN 18, D5-PIN 19, D6-PIN 20, D7-PIN 21 • VPP (programming voltage) Test: Turn on the programming voltage by click on pin 1 (1-Vpp) check box, measure the voltage between PIN 16 and PIN 1.
It should show the Vpp voltage your set. (12V, 15V, 21V, 25V.
Note: there mybe 0.5V tolerance of voltage reading) • Clear All: Clear the whole control signal, address and data output. Then you measure should be all 0V. The software interface: Tool bar: Read data file to buffer, it can be: Intel HEX (*.hex); Binary (*.bin); Motorola S Record (*.s); ALL Eprom File (*.bin, *.hex, *.s) Save data to a file from buffer Clear buffer of programmer software Read data from chip to programmer buffer Blank verify. Verify the chip if it is blank Display chip's factory ID Programming/Test. Programm the chip or test the SRAM. Erase content of chip.